
Creating SVG Files
One of the great things about Scalable Vector Graphics (SVG) is that you can create them in a variety of graphics programs. Also, because the file is based in XML, you can roll your sleeves up and edit the file directly or programmatically via JavaScript
Tools to Create SVG Files
Graphical Editors
Examples of common graphic editors you can use to make SVG files.
Inkscape is free for use and might be a decent option if you don't have access to Illustrator or Sketch. There is a comprehensive tutorial online for using Inkscape. See the section below for more information on creating SVG files in Adobe Illustrator.
Text Editors and JavaScript
You can also create and edit SVG files by simply opening a text editor and creating the files.
SVG graphics should start with the svg element:
<svg  version="1.1" xmlns="http://www.w3.org/2000/svg">
   <!-- The actual SVG shapes and paths go here -->
</svg>
Between the svg element you can add in other svg shapes or paths such as circle, rect, ellipse or path.
You can also use several different JavaScript libraries to draw SVG files and manipulate them on your web pages. Examples of these libraries are:
There are also many other options available for JavaScript libraries to manipulate SVG files.
Creating SVG files in Adobe Illustrator
Perhaps the easiest way to create sophisticated SVG files is to use a tool that you are likely already familiar with: Adobe Illustrator. While it's been possible to make SVG files in Illustrator for quite some time, Illustrator CC 2015 added and streamlined the SVG features. These changes include different exporting options, cleaner generated SVG code, and ability to copy and paste SVG files into a text editor.
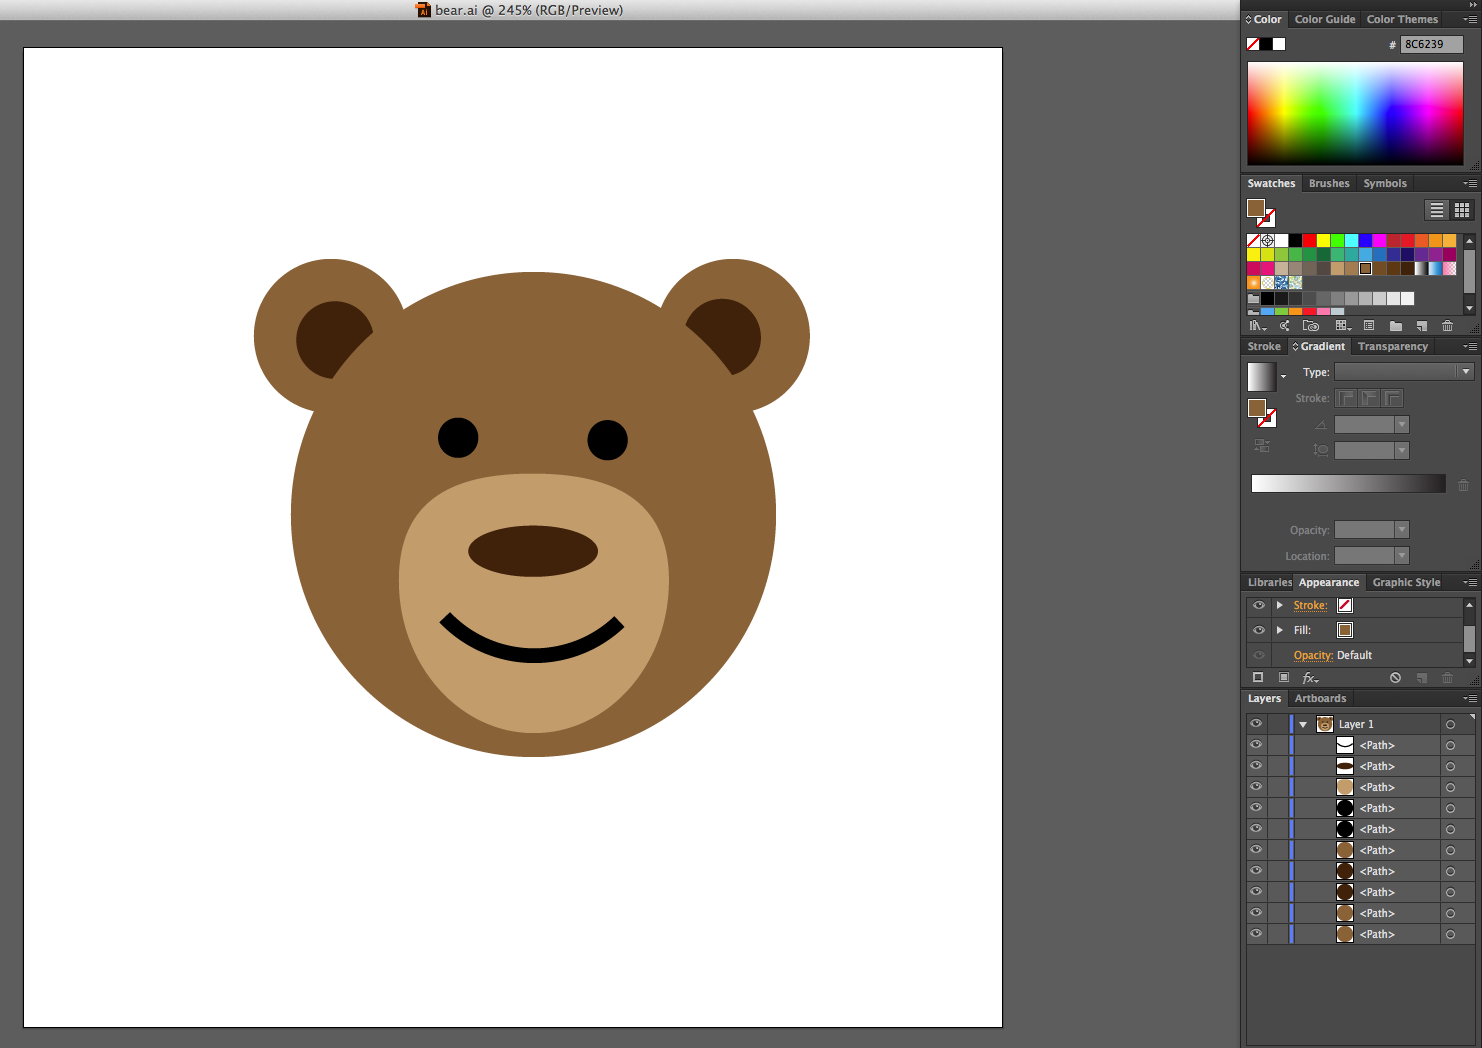
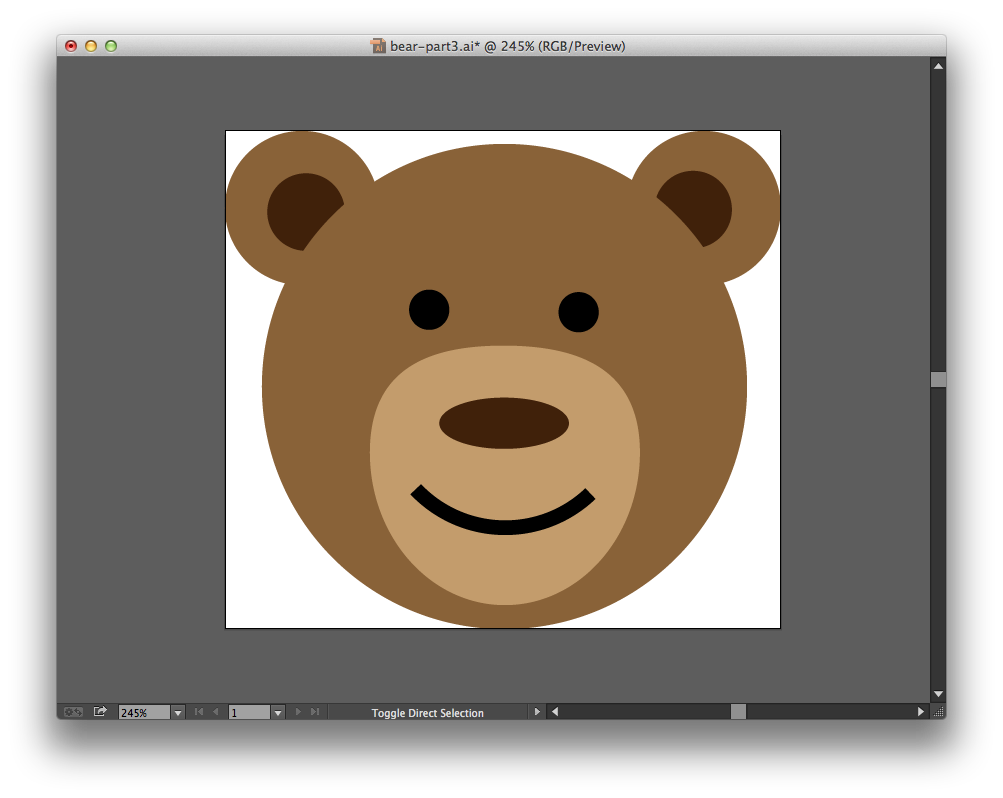
SVG is a native file format in Adobe Illustrator. Start by creating an illustration. Here is an example of a bear face:
You can download the original Adobe Illustrator file too.
Exporting the SVG file
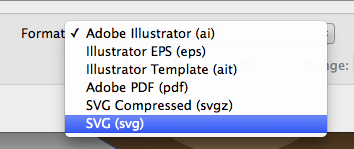
You can use the Save As feature to save to the SVG format directly. Choose File > Save As from the Menu Bar.
You can create a file and then choose File > Save As to save the file.
In the save window, change the Format to SVG (svg) and then click Save.
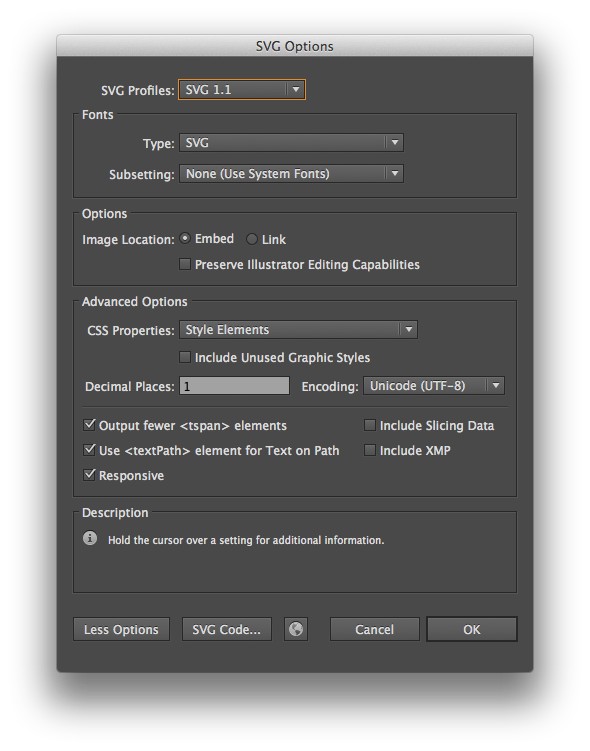
SVG Options
After clicking save an SVG Options window open. This window offers a variety of options to fuss with. For the most part, the default options are ok.
- SVG Profiles: Leave SVG 1.1 selected
- Fonts: These two options only matter if you have text in your graphic. Generally you should leave your type as SVG instead of converting it to outlines. This improves accessibility. Leave these options as the default.
- Image Locations: This only matters if your graphic includes any raster image files in it. Generally, this will not be applicable when creating graphics for the web. Include raster graphics in your SVG kind of defeats the purpose of using them in the first place.
- Preserve Illustrator Editing Capabilities: You should leave this box unchecked. You can always save an ai file for later editing. You will also be able to open the SVG in Illustrator. Checking Preserving editing capabilities will add unnecessary information to your file, making it harder to manipulate in an editor and increasing the size.
Advanced Options
This button provides several "advanced" option for your SVG file.
- CSS Properties: This will affect how the styled properties are written in your SVG file. While all four options will work, usually either Style Elements or Style Attributes will be the best options. For a complete comparison of the options see Demystifying Adobe Illustrator's Advanced Options for SVG Work
- Include unused graphical styles: Leave unchecked
- Decimal Places: This will affect the precision of the numbers in your graphics. More decimal places will result in a slightly larger file size while using few decimal places may result in a loss of detail. Keep in mind that generally the effects of this setting is going to be very subtle.
-
Output fewer
elements :Leave checked -
Use
element for Text on Path : Leave checked - Include Slicing Data: Leave unchecked
- Include XMP: Leave unchecked
-
Responsive: You should check this box to allow your graphic to resize responsively. Without this box checked, Illustrator will add width and height attributes to the
svgelement in your file. You could, of course, always delete those attributes later.
SVG Code Button
You can press this button any time to generate the text of the SVG file. It will automatically open in the default text editor. You can use this to see what your final file will look like or even copy and paste the text from it.
We'll save our bear face graphic using the the Style Elements option in the CSS Properties drop down. All the other options are the default.
This will give us the following SVG file, which we can open in a text editor.
<?xml version="1.0" encoding="utf-8"?>
<!-- Generator: Adobe Illustrator 19.0.0, SVG Export Plug-In . SVG Version: 6.00 Build 0)  -->
<svg version="1.1" id="Layer_1" xmlns="http://www.w3.org/2000/svg" xmlns:xlink="http://www.w3.org/1999/xlink" x="0px" y="0px"
	 viewBox="0 0 400 400" style="enable-background:new 0 0 400 400;" xml:space="preserve">
<style type="text/css">
	.st0{fill:#8C6239;}
	.st1{fill:#42210B;}
	.st2{fill:#C69C6D;}
	.st3{fill:none;stroke:#000000;stroke-width:6;stroke-miterlimit:10;}
</style>
<circle id="XMLID_2_" class="st0" cx="125.6" cy="117.6" r="31.4"/>
<circle id="XMLID_3_" class="st0" cx="289.6" cy="117.6" r="31.4"/>
<circle id="XMLID_8_" class="st1" cx="127.2" cy="119.2" r="15.8"/>
<circle id="XMLID_9_" class="st1" cx="285.2" cy="118.2" r="15.8"/>
<circle id="XMLID_1_" class="st0" cx="208.2" cy="190.4" r="99"/>
<circle id="XMLID_4_" cx="177.5" cy="159.1" r="8.2"/>
<circle id="XMLID_5_" cx="238.5" cy="160.1" r="8.2"/>
<path id="XMLID_11_" class="st2" d="M263.4,217.4c0,34.4-24.7,62.3-55.1,62.3s-55.1-27.9-55.1-62.3s24.1-43.6,54.5-43.6
	S263.4,183,263.4,217.4z"/>
<ellipse id="XMLID_6_" class="st1" cx="208.1" cy="205.4" rx="26.4" ry="10.4"/>
<path id="XMLID_10_" class="st3" d="M243.2,234.2c-20.2,19.2-52,18.4-71.2-1.8"/>
</svg>
Removing the XML Declaration and Comments
When Illustrator generates your SVG file, it adds two extra lines to the top of the file.
The first line is the XML declaration. If you are including your SVG file inline with your HTML, you can safely delete this line. However, if you do not delete it, it will not hurt anything.
<?xml version="1.0" encoding="utf-8"?>The second line is just an HTML comment added by Illustrator to include information about how the graphic was created. This line should be deleted to reduce the final file size.
<!-- Generator: Adobe Illustrator 19.0.0, SVG Export Plug-In . SVG Version: 6.00 Build 0) -->Using Layers In Illustrator Effectively
While the above file will work just fine, we can actually utilize the layers in Illustrator to add names and groups to our final SVG file. The layers and groups in Illustrator will be translated into classes and g elements in the file and will help us style out graphics with CSS.
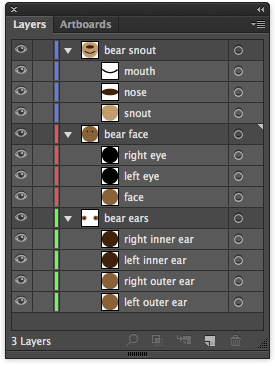
In the original bear file, we didn't name any of the layers or group similar shapes. When we view the file, it is hard to tell which shapes are what. They have strange ids like XMLID_3.
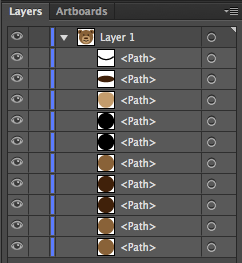
Now I've given each sublayer a name. Each of the names will be translated into an id attribute in our file. I've also organized the layers into logical groups. Each group will be translated into a g element.
<?xml version="1.0" encoding="utf-8"?>
<!-- Generator: Adobe Illustrator 19.0.0, SVG Export Plug-In . SVG Version: 6.00 Build 0)  -->
<svg version="1.1" xmlns="http://www.w3.org/2000/svg" xmlns:xlink="http://www.w3.org/1999/xlink" x="0px" y="0px"
	 viewBox="0 0 400 400" style="enable-background:new 0 0 400 400;" xml:space="preserve">
<style type="text/css">
	.st0{fill:#8C6239;}
	.st1{fill:#42210B;}
	.st2{fill:#C69C6D;}
	.st3{fill:none;stroke:#000000;stroke-width:6;stroke-miterlimit:10;}
</style>
<g id="bear_ears">
	<circle id="left_outer_ear" class="st0" cx="125.6" cy="117.6" r="31.4"/>
	<circle id="right_outer_ear" class="st0" cx="289.6" cy="117.6" r="31.4"/>
	<circle id="left_inner_ear" class="st1" cx="127.2" cy="119.2" r="15.8"/>
	<circle id="right_inner_ear" class="st1" cx="285.2" cy="118.2" r="15.8"/>
</g>
<g id="bear_face">
	<circle id="face" class="st0" cx="208.2" cy="190.4" r="99"/>
	<circle id="left_eye" cx="177.5" cy="159.1" r="8.2"/>
	<circle id="right_eye" cx="238.5" cy="160.1" r="8.2"/>
</g>
<g id="bear_snout">
	<path id="snout" class="st2" d="M263.4,217.4c0,34.4-24.7,62.3-55.1,62.3s-55.1-27.9-55.1-62.3s24.1-43.6,54.5-43.6
		S263.4,183,263.4,217.4z"/>
	<ellipse id="nose" class="st1" cx="208.1" cy="205.4" rx="26.4" ry="10.4"/>
	<path id="mouth" class="st3" d="M243.2,234.2c-20.2,19.2-52,18.4-71.2-1.8"/>
</g>
</svg>
Now our exported SVG file is much more readable and ready to be styled if we want to.
Exactly how you choose to organize your file into groups will depend on your final goal. If you're doing any kind of animation or styling via CSS or JavaScript, it's helpful to have your shapes organized into groups that can be styled or animated together.
Resources for using Illustrator Layers
Generally, the layers work similarly to how they work in Photoshop. Below are some resources:
- Illustrator Help > Layers
- Illustrator CC Essential Training (2015) - Chapter 4: Working with Layers (Lynda.com)
- Stay Organized with Layers (Adobe Tutorial)
Setting the Artboard Bounds
Your actual graphic probably will not fill the entire Artboard (white background) in Illustrator. If you export your SVG file without addressing this, your file will end up including all that extra space. While this will not affect the file size, it will affect how your graphic displays in a browser. Before saving your graphic, you show make sure that you fit the Artboard to the artwork.
In the Menu Bar, go to Object > Artboards > Fit to Artwork Bounds.
After doing this, our bear file looks like this:
Tips to Consider When Creating Your SVG
- Always name and group your layers.
- Try to keep your graphics as simple as possible. Remember that not everything Illustrator is capable of can be rendered in SVG.
- Use the simple shape tools wherever possible. Shapes like rectangles, circles, ellipses, polygons and lines all have native counterparts in SVG.
- Remember when you are drawing your SVG that each shape, line, gradient, etc. will be represented in the SVG syntax. SVG excels at representing simple shapes, lines and text. However, if your graphic becomes too complicated (too many complicated paths or textures), you might find that your resulting SVG file is too large.
More Resources
- Tips for Creating and Exporting Better SVGs for the Web - Excellent Article!
- The State of SVG Animation - Skip the first section about SMIL